Wednesday, March 28, 2018

New bookmark

I'm one of those people that has yet to transition to digital reading.  There's something special about holding a good book in your hand, turning the pages in anticipation of what will happen next and of course the smell of the paper.  I'm not sure I'll even give up reading a book I can physically hold lol.  So what better way to keep my place than a new handmade bookmark?!  I'm always looking for one so I resort to grabbing the nearest scrap of paper or receipt - not an issue anymore.  I now have this adorable bookmark to hold my place.


The adorable image is from Gerda Steiner Designs called Snoozing Cat - I really like the little mouse peeking from the stack of books.

I used my Tim Holtz Sizzix  Tag Collection dies to make this bookmark base.  I also cut out a small tag and added a fun quote about reading.  Adhered that to my bookmark with a pink glittery enamel dot. Then laminated the base so it wouldn't get damaged.  I added a fun ribbon and twine bow and now I have a fun girly bookmark.  Off to read my next adventure.


Monday, March 26, 2018

Freebie for all

Last week I shared a fun slider card and promised I'd share the file I created with all the pieces needed for the card.  Interactive cards are fun to create and the recipient sure loves a little something extra as well.  

So today, we are going to make this cute Easter card using the file available below.

 
The file includes the following pieces:

Card Base - 5.5in x 5.5in (White pc)
Base Mat 5.375in x 5.375in (yellow pc)
Card top template (green pc)
Card top panel base 3.25in x 3.25in (White pc)
Card top panel mat 3.125in x 3.125in (yellow pc)
Card top (for your image) 3in x 3in (green pc)
Sentiment piece 1.5in x 3.75in (top piece in the middle)
Slider mechanisms (2nd and 3rd pieces in the middle) pull tab 1.25in x 4.5in cross bar .5in x 3.75in


VERY IMPORTANT to note BEFORE cutting this file - if you do not a way to SCORE your card top template using your machine, you will need to REMOVE the BLUE lines shown in the file.  Those that have the ability to cut and score, set the blue lines to a SCORE option.  If you have to manually score your card top, you will need to score the flap between the cut lines on the LEFT side, then 1 1/2" to the RIGHT and 1/4" from the RIGHT side, keeping the score lines only on the flap piece.

Now it's time to fold the flap - do a mountain fold, then a valley fold.


Next, you will want to complete your sentiment strip.  You'll want to decorate about 3/4 of the tab, leaving the right side blank.


We are now going to attach the sentiment tab to the card top.  Flip your card top over, keeping the message opening to right (small cutout section). The flipside of my paper is upside down, so don't let that throw you off lol.


Apply double sided adhesive to the front of your sentiment piece on the LEFT side only, no more than 1/2 from the edge.


To attach the sentiment piece turn it over, keeping the adhesive on the LEFT side.  Slide the sentiment piece through the cutout section, lining up the edges of the sentiment piece and the edge of the flap while keeping it centered between that cutout.  When it's in place, press the left side down.


When you flip your card top over, you will see a small part of your sentiment piece showing through. 


You can then slide the top piece over to see the entire sentiment.


Next step is to stamp or write PULL on your pull tab. I used my Chomas Creations Pen holder when I cut my pieces to write the word pull.


Flip your card top over again.  Add double sided tape to the 1/4in strip on the flap (this will be the very edge between the fold and the edge of the flap).


Now you will need to take your cross bar and adhere it to the edge of your flap.  it should align flush with the cutout from the sentiment and the edge of the flap.  Be sure it is centered, so the top and bottom have roughly 1/4in overhang.


We will now add a small piece of double sided tape to the RIGHT edge of the pull tab.


To secure the pull tab turn it over, center it over your sentiment piece with about 1/2in extending over the left side of the card top.  


Flip your card top over - you should see a small section of your pull tab on the left and a small section of your sentiment piece showing.


You can now test out your slider.


I added my mat to my card base at this point.


To secure the card top, you'll want to add double side adhesive to the back.  So turn your piece over again.  Be extremely careful where you place your tape as it is super easy to stick it in the wrong place and the card will not slide.

Add double side adhesive to the top, bottom and right hand side.


Add smaller pieces to the left side above and below the pull tab.  Keep at least 1/4in clearance on top and bottom so the pull tab can move freely.


Next, apply a piece that runs from the top to bottom along the flap opening.


OPTIONAL - Add two more pieces of tape, 1/4in above the bottom piece and 1/4in below the top piece.  Again, leave plenty of clearance for the cross bar to clear the tape section. Since my tape was wide enough, I opted not do to this step. 

Your last two pieces will be small ones added above and below the sentiment piece on the left side, near your score line.


Remove all the backing and apply the top base to your mat. 


Your slider mechanism should move freely exposing your message.


You can now work on your top panel pieces.  Add your mat to your base piece.


Decorate your top piece (3in x 3in) however you want - stamped image, paper pieced cutie, etc.  Here you can see I added this really fun new Easter Basket Cutie from KaDoodle Bug Designs to mine.  Then adhere that to your top panel base.


Now you will add double sided tape to the LEFT section of your flap, do not go beyond your score lines.


Place your panel on the tape.  Embellish the top panel to your liking and your card is now complete.


You can download this file by clicking here.

If you have any questions or get stumped assembling the card, please let me know!  You can leave a message here or contact me on Facebook.  

Thanks for stopping by!!

Goodies used on this fun card:
doodlebug designs inc. ~ easter parade bunny & friends
Bazzill Cardstock
Core'dinations Cardstock
Recollections Cardstock
Chomas Creations Engraving Tip
Chomas Creations Pen Holder
Jelly Roll Pen ~ Black
ColorBox Chalk ~ Chestnut Roan, Blue Lagoon, Harvest, Warm Violet, Aquamarine, and Burnt Sienna
Tim Holtz Stamp Platform
Archival Jet Black Ink
Studio G Easter Stamp
Gelly Roll Pens ~ Neon Colors
Signo White Pen
Spectrum Noir Sparkle Pen


Friday, March 23, 2018

Hippity Hoppy....

Just when I think I'm done with my Easter cards, KBD releases more adorable cuties!!  This new Marshmallow Bunny was calling my name so I had to create with her lol.  You know you want to add this file to your collection! lol


And what better way to use a new file than on a new card style?  I think it's fun to create scenes with different layers to cards, so this Joy Fold card is a perfect base.


I started out by planning my layers - the top I wanted to be a bunny trail on a beautiful sunny day.  My next layer I wanted the little basket with goodies left behind and on the inside I wanted that adorable bunny to be found.

I cut all my pieces for the bunny and basket, then chalked/inked all the edges.  I do give a complete list of the colors i used below if anyone ever wonders what I use.


Now for the card... you will want to cut the following pieces of cardstock:
Solid Cardstock:
Main Base - 4 1/4" x 8 1/2"
Top Base - 3" x 8"

Pattern Paper
Main Base Pattern Paper - 4" x 5 1/4"
Main Base Flaps (2) 2 3/4" x 4"
Top Base Flaps (2) 2 3/4" x 3 3/4"

Mat pieces for the pattern paper (optional)
Main Base 4 1/8" x 5 3/8"
Main Base Flaps (2) 2 7/8" x 3 7/8"
Top Base Flaps (2) 2 7/8" x 3 7/8"


You will SCORE the main base piece at 5 1/2" and the top base at 4".


Adhere the main base mat and patterned paper to the main base piece.  If your patterned paper has a directional layout, be sure the main base flap is on the LEFT side of your card.


Then adhere the layers for your flap on the left.  (The Main Base Flap pieces)


Turn your card over and adhere the other Main Base Flap pieces you have cut


For the top base, you are going to want the fold to be on your RIGHT side as you decorate the top.


Open the top piece up and adhere your decorative paper and mat to the LEFT hand flap - the right side will be for your sentiment or message.


Now is the perfect time to stamp your sentiment on the RIGHT side.


Take your top base and attach it to the card base, again keep the fold of the main base to your RIGHT and the fold of the top base to your LEFT.


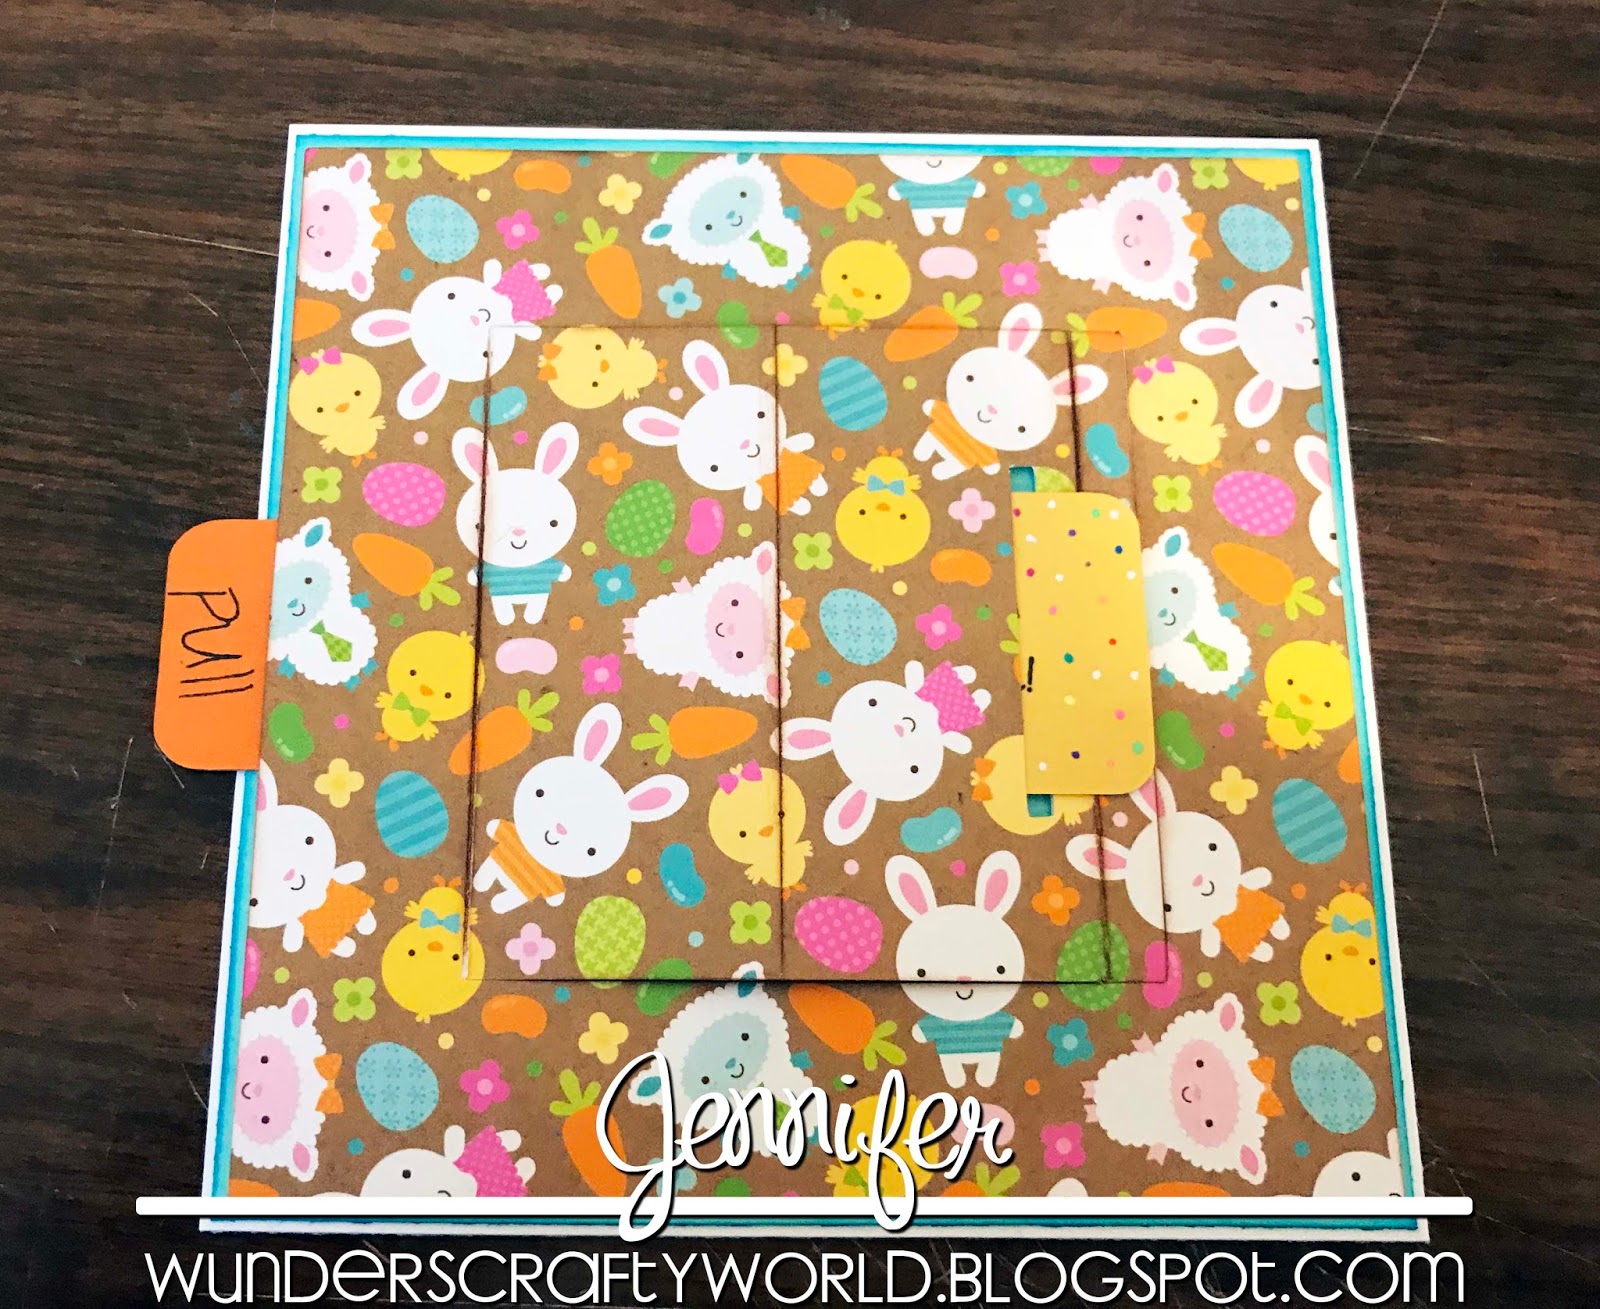
To secure your top flap, add a small embellishment on the left side of the card using foam tape on half of your item.


Now you can decorate the panels to your liking.

I added some sparkle to my Peeps to resemble sugar.


If you have any questions about the tutorial, please let me know!  I'm more than happy to help anyone who gets stumped or has questions.  You can add a comment here or send me a message on my Facebook page.

Thanks for visiting!!

Goodies used on this card:
KaDoodle Bug Designs ~ Marshmallow Bunny Cutie
KaDoodle Bug Designs ~ Hoppy Easter (the basket)
Xyron Creative Station
BigShot
Circle Stitched Dies
Pink & Main Plane Sweet Dies
Lawn Fawn ~ Grassy Border Die
Die-namics ~ Snow Drifts Die
Lawn Fawn Perfectly Plaid
DoodleBug Designs ~ easter express paper pad
Authentique Paper ~ Springtime
Bazzill Cardstock
Recollections Cardstock
ColorBox Chalk ~ Sour Apple, Warm Green, Ocean, Harvest, Berrylicious, and Pink Pastel
Pebbles Classic Chalks
Recollections Black Pen
Signo White Pen
Tim Holtz Stamp Pad
Archival Jet Black Ink
Studio G Easter Stamp