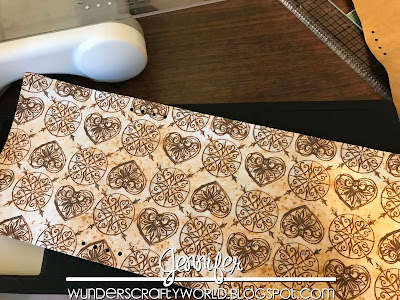
So once again, I wet down my faux leather paper in my kitchen sink instead of running it through the washing machine. I soaked it, rang it out and repeated until I liked the appearance of the "leather".
Here you can see it wringed out and ready to dry.
I literally hung my leather piece outside to dry on my garden flag holder. It's warm enough so I knew it wouldn't take long to dry completely.
Here's a comparison of the paper. The top piece was just cut off the roll. The bottom is the rinsed out piece. It's super soft after it's been worked for a while.
Time to run the paper through the BigShot and use that amazing die!!
Next is my lining. Had I knew when I started how I wanted my closure to be done, I would have attached it to the paper before cutting anything. But I wasn't sure where this one was going so I cut them individually. The fabric is backed with strong Heat 'n Bond, which will keep the edges from fraying and also adhere better to the leather when I iron it.
Here's my fabric lining cut ~ I LOVE this fabric and it was the inspiration for the cover.
Front and back of the journal so far.
My original plan was to try wood burning the images on the outside, however that was an epic fail testing. If it was real leather, it would have been perfect. It just burned the paper fibers. But that's ok... I have an even better plan. I decided I wanted to paint my outer piece but wanted to keep my designs the natural color. I cut my designs from vinyl and applied it to the journal where I wanted them.
Time to get messy! And messy I got lol. I used my gel plate to lay down a layer of Vibrant Turquoise Dylusions paint and randomly applied the journal to the plate. I made sure it didn't cover every inch of the journal - I wanted it to still have the worn in appearance. I then added some Mushy Peas Dylusions paint over the gel plate and randomly laid the cover over the plate. You'll notice I did use some washi tape to cover my holes to ensure the paint did not seep through.
And here you can see how beautiful these colors work together!
Dry time! I left this to dry overnight. leaving the vinyl in place.
Once it was dry, I removed the vinyl to expose the natural color of the paper. I love the contrast between them. I then stitched around the border with a beautiful matching thread. Next I added my leather cording for the signatures. I decided to have the signatures removable so the journal could be reused after they were full. I added beads and a feather to the ends, which dangle over the beautiful tree.
When I finally figured out my closure, I punched two holes in the center of fold. I added a button using the same leather cord. I tied the button in place and added a couple wood beads to the ends.
And finally, here is the beautiful wrapped journal. Even with the paint, this leather paper is still soft to the touch.
This couldn't have come together better. Starting out with only a piece of fabric and letting my imagination run has really turned out for the better.
For this journal I used these amazing products:
KaDoodle Bug Designs ~ PG Wild and Free Title
Eileen Hull/Sizzix ~ Wrapped Journal Die
BigShot
Silhouette Natural Faux Leather Paper
Scrap Fabric
Heat 'n Bond
Scrap Vinyl
Dylusions Paint ~ Vibrant Turquois and Mushy Peas
Gel Plate
Tim Holtz Accoutrements
hildie & jo wood beads
ZFP Feathers
Darice All Purpose Tacky Glue
Leather Cord
Turquoise Thread
Sewing Machine
Thank you all for stopping by and seeing my latest journal!


No comments:
Post a Comment